Set Up Your Own Private CA at Lightning Speed


The adoption of Private Certificate Authority (CA) has increased tremendously with the expanded use scenarios in remote work in the enterprise, DevOps workflow on the cloud, and IoT device security. Historically, the creation and set up of a Private CA has been lengthy—sometimes weeks—requiring expensive PKI experts.
With the introduction of the new Private CA infrastructure on Sectigo Secure Cloud, we have reduced the setup and onboarding process down to minutes. To experience the ease of use and the ultra-fast speed of set up and certificate issuance, you can follow the process below:
Step 1: Sign Up for the Free Trial
- First, sign up for a free trial of Sectigo Certificate Manager (SCM) by providing some preliminary information at this URL: https://www.sectigo.com/sectigo-certificate-manager-trial#scm-account-form
- You will receive an email with instructions on how to login to SCM. Click on the link provided in the email and enter the credentials that you specified during sign-up and login. You may want to bookmark this link for later use.
Step 2: Set Up Your Organization and Domains
- In SCM, go to SETTINGS —> Organization and you will see an Organization already created for you. You can customize the information later, if required.
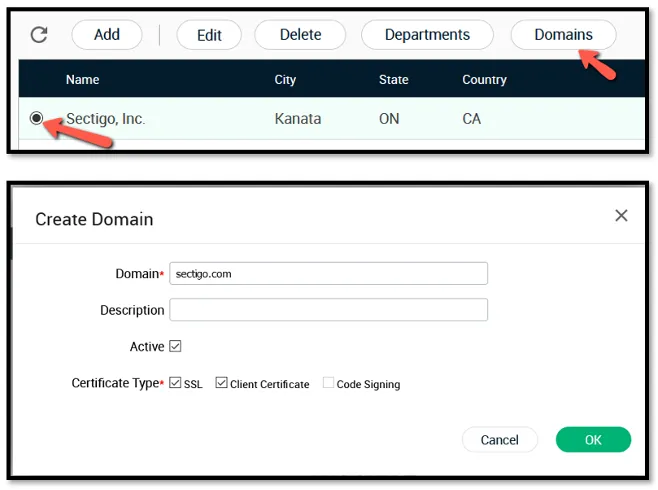
- Select the Organization, click on Domains just above it and create a domain. This domain will be used as an identifier in your SSL certificate, which we will issue at a later step. The newly created domain will be automatically associated with the Organization. (This is known as Delegating a Domain in Sectigo parlance.)

Step 3: Set Up Your Private CAs
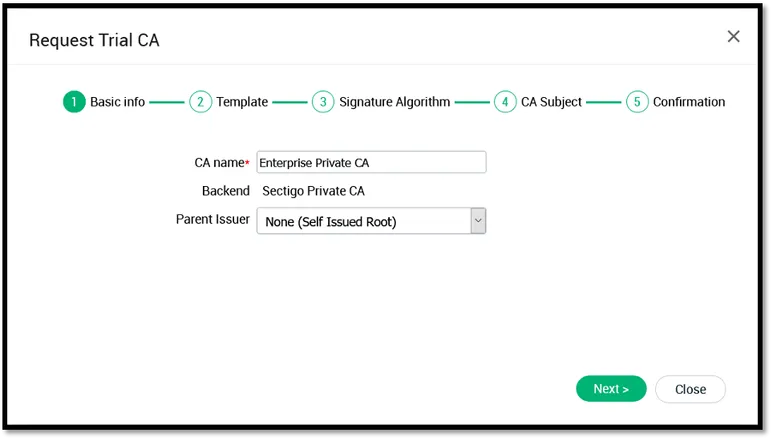
- Go to SETTINGS —> Certificates —> Private CAs and click on Add. Follow the wizard and within a few minutes you will have created a Root Private CA. Select the CA and click on Download Certificate.
- Repeat the previous step, select the Root Private CA you created as the Parent Issuer, complete the steps, and you will have created an Issuing Private CA. Select the CA and click on Download Certificate. Your online Root and Issuing CA’s keys are stored in a HSM providing you strong security.

Step 4: Set Up Your Certificate Profiles and Issue Certificates
- Go to SETTINGS —> Certificates —> Certificate Profiles and click Add. In the form displayed, enter the properties and select the type of Certificate Profile from the drop-down list. In this exercise, we will select an SSL certificate profile.
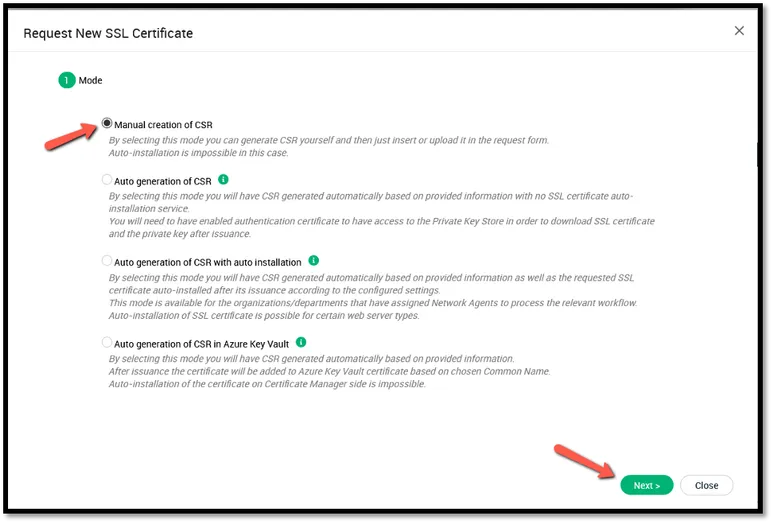
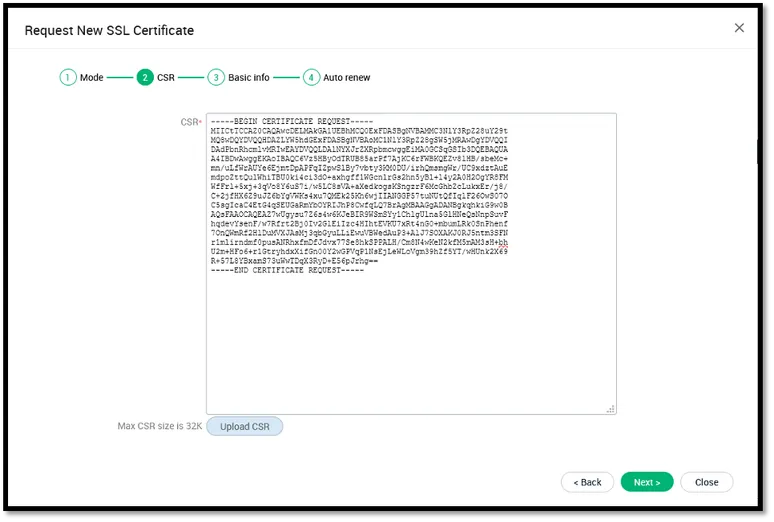
- Go to CERTIFICATES —> SSL Certificates, and click on Add. Follow the wizard, select Manual creation of CSR option (for this exercise), copy a CSR that you created with OpenSSL or any other available free tools (such as, this one: https://csrgenerator.com/ ) and complete the remaining steps. You will be able to view the newly created SSL certificate request in the CERTIFICATES —> SSL Certificates page. Select it, click on Approve and within a few seconds, you will be able to retrieve the certificate by clicking on the Download button.


Congratulations! You have set up your Private CA infrastructure from Sectigo and issued your first certificate from it.
Sectigo Private CA is hosted in SOC3 audited secure facilities with dual control of access and handling, and provides High Availability and Disaster Recovery. For additional information, refer to the Enterprise Certificate Authority Made Easy white paper white paper.