How to Install Certificates on Ensim Control Panel
This article will go into detail on how to install certificates on Ensim Control Panel.
Step one: Loading the Site Certificate
You will receive an email from us with the certificate in the email (yourdomainname.crt). When viewed in a text editor, your certificate will look something like:
-----BEGIN CERTIFICATE-----
MIAGCSqGSIb3DQEHAqCAMIACAQExADALBgkqhkiG9w0BBwGggDCCAmowggHXAhAF
(.......)
K99c42ku3QrlX2+KeDi+xBG2cEIsdSiXeQS/16S36ITclu4AADEAAAAAAAAA
-----END CERTIFICATE-----
Copy your Certificate into the directory that you will be using to hold your certificates. In this example we will use /etc/ssl/crt/. Both the public and private key files will already be in this directory. The private key used in the example will be labelled private.key and the public key will be yourdomainname.crt.
It is recommended that you make the directory that contains the private key file only readable by root.
Login to the Administrator console and select the site that the certificate was requested for.
Select Services, then Actions next to Apache Web Server and then SSL Settings. There should already be a 'Self Signed' certificate saved.
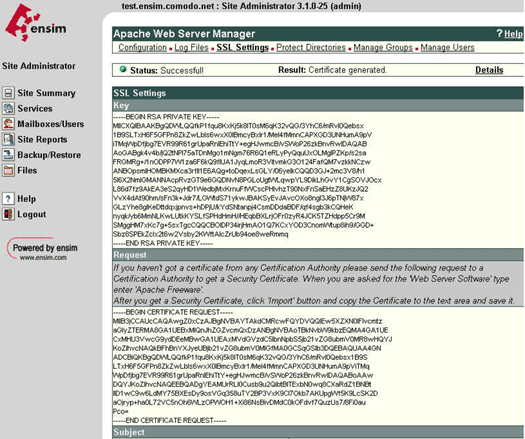
Select 'Import' and copy the text from the yourdomainname.crt file into the box
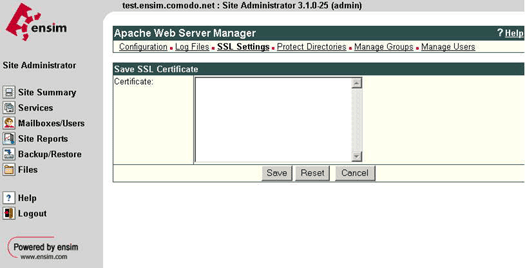
Select 'Save', the status should now change to successful.

Logout, do not select delete as this will delete the installed certificate.
Step two: Install the Intermediate
You will need to install the Intermediate CA certificate in order for browsers to trust your certificate. As well as your SSL two other certificates are also attached to the email. You will need to install the intermediate CA certificate.
In the Virtual Host settings for your site, in the virtual site file, you will need to add the following directives. This may be achieved by:
1. Copy the intermediate CA file to the same directory as the certificate.
2. Add the following line to the virtual host file under the virtual host domain for your site (assuming /etc/ssl/crt is the directory mentioned in 1.), if the line already exists amend it to read the following:
SSLCACertificateFile /etc/ssl/crt/ca.txt
If you are using a different location and certificate file names you will need to change the path and filename to reflect this.
The SSL section of the updated virtual host file should now read similar to this example (depending on your naming and directories used):
SSLCertificateFile /etc/ssl/crt/yourdomainname.crt
SSLCertificateKeyFile /etc/ssl/crt/private.key
SSLCACertificateFile /etc/ssl/crt/ca.txt
Save your virtual host file and restart Apache.
You are now set to start using your certificate with your Apache Ensim configuration.